
Craft Wood Slices: Creative Ideas & Essential Tips
Craft Wood Slices: Your Guide to Rustic DIY Projects
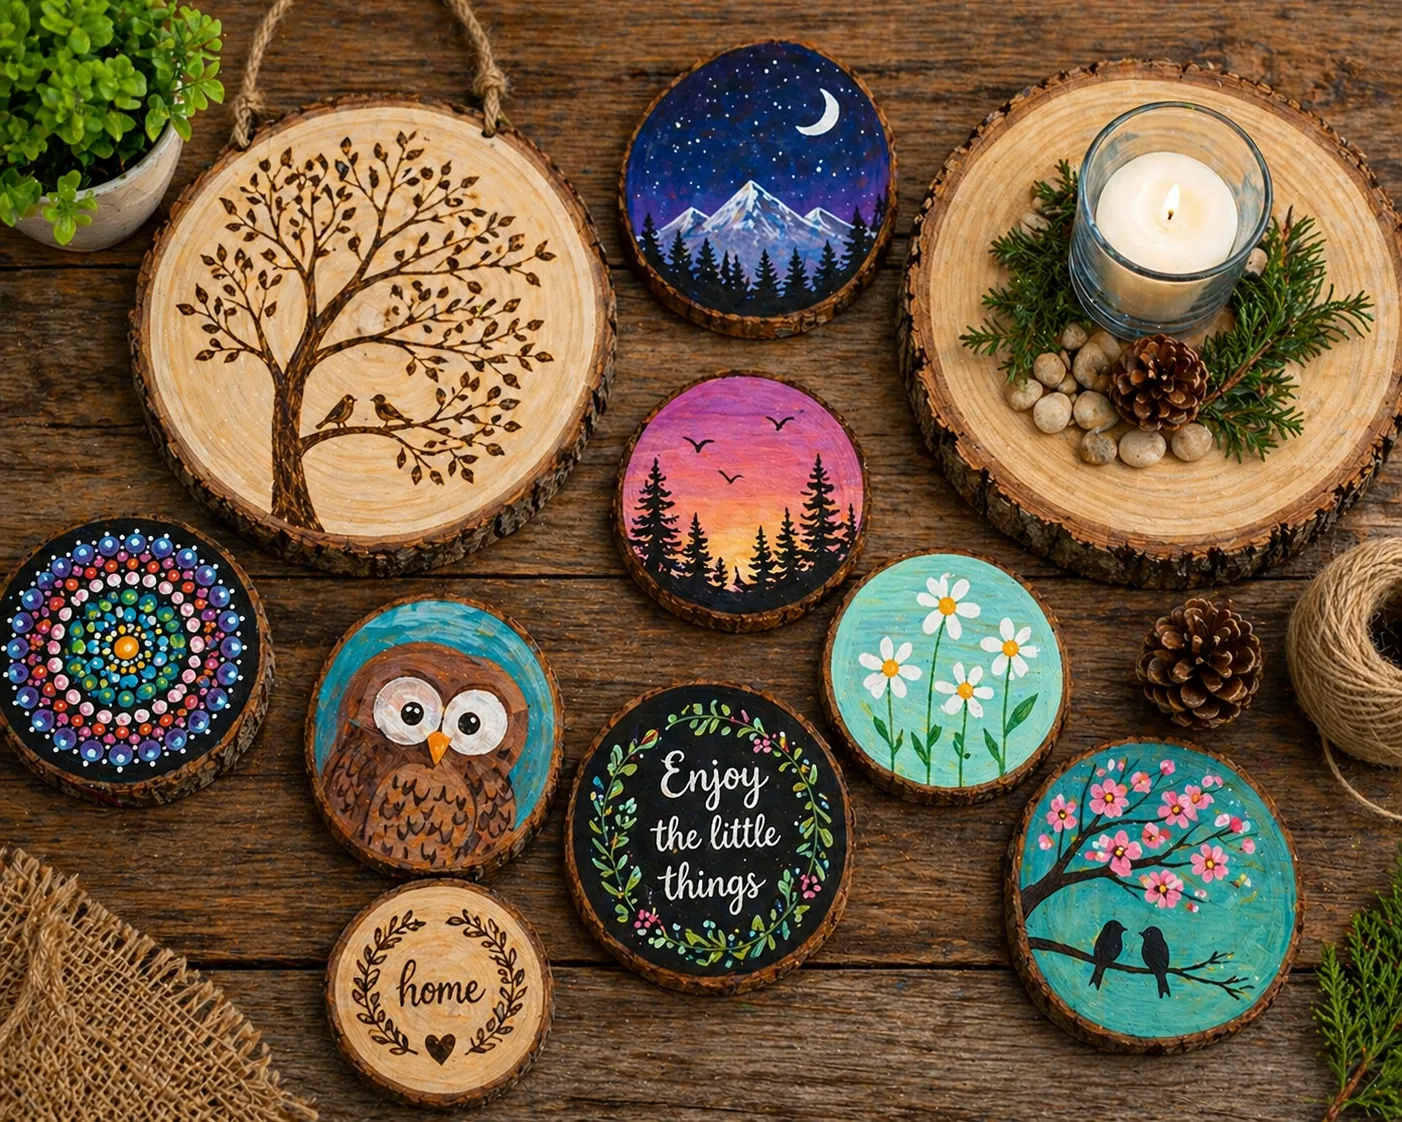
Craft wood slices, also known as wood rounds or cookies, have surged in popularity for DIY enthusiasts and home decorators. These natural, rustic elements bring a touch of the outdoors inside, offering a versatile canvas for countless creative projects.
Whether you’re a seasoned crafter or just starting, understanding how to select, prepare, and utilize these materials is key to successful creations. This guide will walk you through everything you need to know.
What Are Craft Wood Slices?
Fundamentally, craft wood slices are cross-sectional cuts from tree branches or logs. They are typically sanded smooth on one or both sides, showcasing the beautiful, unique grain patterns and often the tree’s growth rings. Consequently, no two slices are exactly alike, which adds to their charm.
They are available in various diameters and thicknesses, making them suitable for projects ranging from delicate ornaments to substantial centerpieces.
Popular Types of Wood for Slicing
Different woods offer distinct characteristics. Here’s a quick comparison:
| Wood Type | Typical Characteristics | Best For |
|---|---|---|
| Pine | Light color, soft wood, prominent grain | Beginner projects, painting, children’s crafts |
| Birch | Smooth, pale bark, fine grain | Detailed pyrography (wood burning), staining |
| Walnut | Rich, dark brown heartwood, durable | Elegant decor, jewelry, high-contrast projects |
| Aspen | Very light, almost white, uniform texture | Painting, decoupage, rustic signs |
| Oak | Strong, prominent grain patterns | Coasters, durable decor items |
Essential Preparation: Drying and Sealing
Before you begin any project, proper preparation of your wood slices is non-negotiable. Freshly cut wood contains moisture, which will cause it to crack and warp as it dries. Therefore, you must properly dry or “season” your slices.
Firstly, the most reliable method is kiln-drying, which professionally removes moisture. If you’re cutting your own, air-drying in a cool, dry place for several months is necessary. Moreover, to prevent excessive cracking, you can seal the end grain with a commercial sealant or even a wax like beeswax.
Once dry, sanding is crucial. Start with a coarse grit sandpaper and work your way to a fine grit for a silky-smooth surface. Finally, applying a sealant before decorating protects the wood and provides a better surface for paints, inks, and stains. A simple clear polyurethane or a natural oil like linseed oil works perfectly.
Creative Project Ideas for Wood Slices
The possibilities are nearly endless. Here are some inspiring ideas to get your creativity flowing.
Home Decor & Ornaments
Wood slices form the perfect base for rustic home accents.
* Coasters: Simply sand, seal, and optionally add felt pads underneath. For a personalized touch, you can use wood burning or paint.
* Wall Art: Create a stunning feature by arranging slices of different sizes on a wall. You can paint patterns, inspirational quotes, or even miniature landscapes on them.
* Seasonal Decor: Paint them for holidays—think snowmen for winter, pumpkins for fall, or vibrant flowers for spring. For more seasonal inspiration, explore ideas for religious Easter crafts that can be adapted to wood.
* Centerpieces: Group slices with candles, moss, or other natural elements for a beautiful table setting.
Functional & Giftable Crafts
Combine beauty with utility for thoughtful handmade gifts.
* Magnets: Glue small, strong magnets to the back of tiny slices decorated with initials or simple icons.
* Ornaments: Drill a small hole at the top, add a ribbon, and decorate for timeless tree ornaments.
* Charging Stand: Glue a slice to a small wooden block to create a unique stand for a smartphone or smartwatch.
* Jewelry: Very thin, small slices can be made into pendants, earrings, and brooches.
Engaging Activities for All Ages
Wood crafting isn’t just for adults. With supervision, children can enjoy simple projects. For instance, they can use non-toxic paints to create their own masterpieces. This activity pairs wonderfully with other hands-on crafts, like our guide to easy paper plate flower craft for preschoolers, offering a full afternoon of creative fun.
Pro Tips for Working with Wood Slices
To ensure your projects look professional and last, keep these tips in mind.
* Choose the Right Slice: Match the wood type and size to your project. A soft pine is easier for children to paint, while a hard oak is better for a coaster that will hold a hot mug.
* Mind the Bark: Bark can fall off over time. If you want to keep it, ensure the slice is very dry and consider using a clear resin or strong glue to secure it.
* Experiment with Mediums: Don’t limit yourself to paint. Try pyrography, decoupage with napkins, or even embossing with stamps and ink.
* Finish Strong: Always apply a final protective sealant over your completed artwork. This guards against moisture, UV fading, and general wear.
Frequently Asked Questions (FAQs) – Craft Wood Slices
1. What are craft wood slices?
Craft wood slices are small round or natural-cut pieces of wood used for DIY projects, decorations, and handmade crafts.
2. What are wood slices used for in crafts?
They are used for ornaments, coasters, signs, painting projects, wedding décor, and personalized gifts.
3. Are craft wood slices natural wood?
Yes, many wood slices are made from natural branches or tree trunks with bark edges for a rustic look.
4. Can I paint on wood slices?
Yes, acrylic paint, markers, wood stain, and paint pens work well on wood slices.
5. How do I prepare wood slices for crafting?
Lightly sand the surface, wipe off dust, and seal if needed before painting or decorating.
6. Are wood slices good for beginners?
Yes, they are easy to use and ideal for beginner DIY projects.
7. What size wood slices are best for crafts?
Small slices are great for ornaments, medium for coasters, and larger slices for signs or centerpieces.
8. Can I use wood slices for weddings?
Yes, wood slices are popular for rustic wedding centerpieces, table numbers, and ring holders.
9. How do I stop wood slices from cracking?
Keep them dry, store properly, and use sealers or stabilizers when needed.
10. Can kids use wood slices for crafts?
Yes, kids can paint and decorate them with supervision.
11. Are wood slices eco-friendly?
They can be eco-friendly when sourced responsibly or made from reclaimed wood.
12. Can I engrave wood slices?
Yes, many people use wood burning or laser engraving for names, art, and gifts.
13. What glue works best on wood slices?
Strong craft glue, wood glue, or hot glue usually works well depending on the project.
14. Can I sell crafts made from wood slices?
Yes, personalized wood slice crafts are popular on handmade marketplaces and fairs.
15. Why are craft wood slices so popular?
They are affordable, versatile, natural-looking, and perfect for rustic DIY décor.
Sourcing Your Materials
You can purchase pre-cut, sanded, and dried craft wood slices from craft stores or online retailers, which is the most convenient option. Alternatively, if you have access to fallen branches (never cut from live trees without permission), you can make your own with a sharp handsaw or a power saw. Remember, safety first—always use appropriate protective gear.
In conclusion, craft wood slices are a wonderfully versatile and natural material that invites creativity. By starting with properly prepared slices and applying a bit of imagination, you can create beautiful, personalized items for your home or as heartfelt gifts. So, gather your supplies and let the rustic crafting begin! For more information on the properties of different woods, you can refer to resources like the Wood Database.